
The information in this post is out of date and should not be used as a guidance when configuring IP SSL for Azure Web Apps. Specifically if your custom domain is a CNAME to the default web app domain (e.g. contoso.azurewebsites.net) then it is not necessary to do any A record or CNAME changes as described in this article. The web app domains will be automatically remapped to the dedicated IP address when you enable IP SSL.
Azure Web Sites started to support custom domains SSL functionality recently. There are two SSL modes supported:
- SNI based SSL. This is an extension to SSL and Transport Layer Security (TLS) that allows multiple domains to share the same IP address, with separate security certificates for each domain. Most modern browsers (including Internet Explorer, Chrome, Firefox and Opera) support SNI, however older browsers may not support SNI.
- IP based SSL. This mode associates a certificate with a domain name by mapping the dedicated public IP address of the server to the domain name. This requires each domain name (contoso.com, fabricam.com, etc.) associated with your service to have a dedicated IP address. This is the traditional method of associating SSL certificates with a web server.
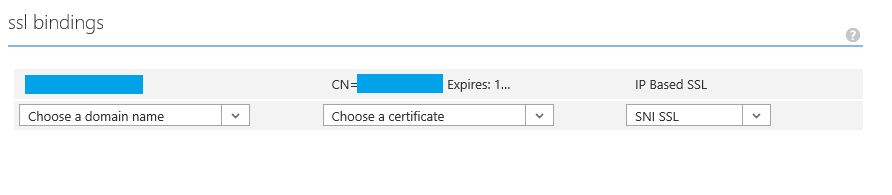
The SNI SSL setup is pretty simple and is documented in “How to enable SSL web site“. The IP SSL setup is more tricky, and unfortunately an important step is missing from that article. Without performing that step the domain name configured for IP SSL will continue to work as SNI SSL. The Windows Azure team is looking into fixing the documentation and UI workflow to prevent this confusion going forward. Meanwhile this blog post explains how to make sure IP SSL is configured correctly.
How to check if IP SSL is working
After enabling IP SSL for your custom domain the simplest way to test it is working is to use IE with TLS 1.0 option DISABLED. Open IE then go to Internet Options –> Advanced and uncheck the “Use TLS 1.0” checkbox.
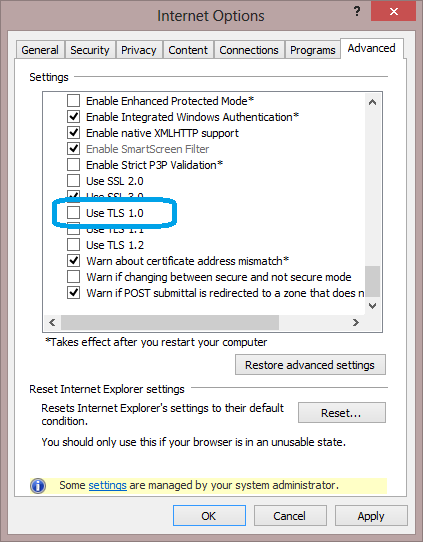
This basically emulates the behavior of web browsers that do not support SNI. Browse to your site using the custom domain name. Check which certificate is used. If IP SSL was not configured correctly then you will see the certificate error as below. If you do not see this error then IP SSL is working correctly.

How to fix IP SSL configuration
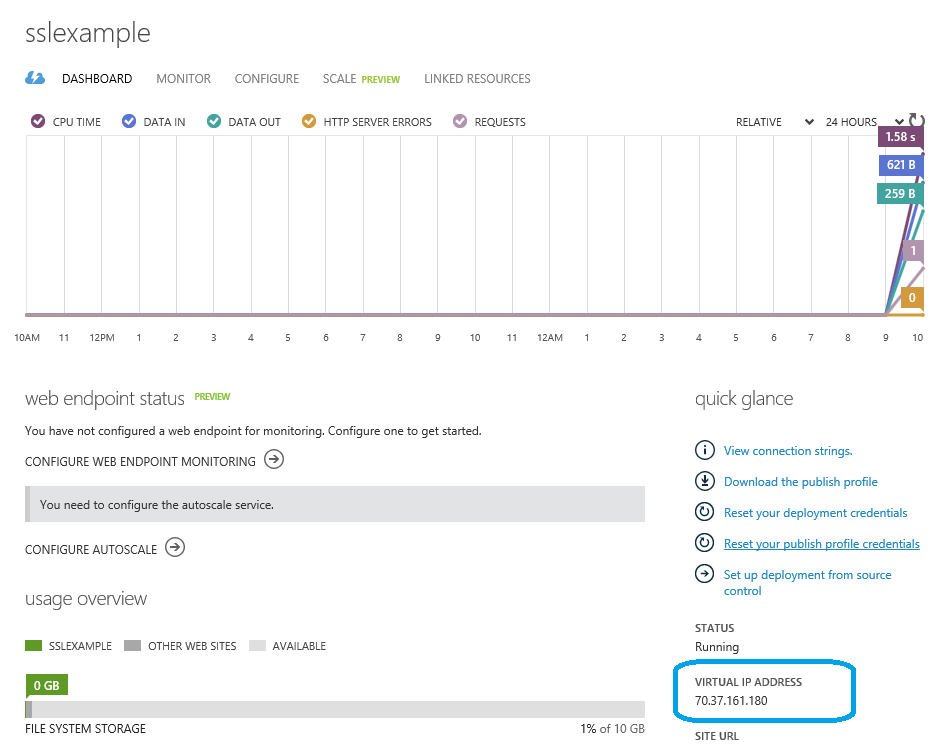
IP SSL requires a dedicated public IP address to be associated with a domain name. So when you enable an IP SSL binding for a custom domain name in Windows Azure Portal:
a dedicated IP address is assigned to your site. You can find this IP address on the site’s dashboard page in Windows Azure Portal (look for “VIRTUAL IP ADDRESS:“).
This dedicated IP address is different from the default Azure Web Sites IP address that was used when you’ve configured custom domain A record or CNAME. Any HTTP traffic that arrives on this new IP address will be using your custom SSL certificate. Any HTTP traffic that still arrives on the default Windows Azure IP address will continue to use SNI SSL (or default Azure Web Sites SSL certificate if HTTP client does not support SNI).
So to have IP SSL working properly you’ll need to update an A record for your domain name so that it points to the dedicated IP address assigned to your site instead of the default Azure Web Sites IP address. To do that logon to your DNS registrar’s web site, go to the page for managing DNS and configure the domain and IP address as follows:
| Alias | TTL | Type | Value |
|---|---|---|---|
| contoso.com | 7200 | A | <Dedicated IP address assigned to your site> |
Note that if your custom domain had a CNAME record pointing to yoursite.azurewebsites.net then you need to remove that CNAME record.
Issues and Warnings:
Concerned about the fact that a dedicated IP address is assigned automatically based on SSL Binding status I deliberately assigned IP Based SSL to a site, noted the IP address, removed the cert (saved changes) and applied another one, with the result that the site now has a different IP address.
This means you have to be careful to apply a new IP Based SSL binding before removing an old one (e.g. when applying a new cert because the old one is due to expire) in order to not loose the IP address (and hence invalidate the A record).
It would be better if the workflow allowed assigning a dedicated IP address first, which stays with the site, and only then offers the option to assign a IP Based SSL Binding.
Other UI Issue: The dropdown for the certificate in the SSL binding section only shows the type/class of a certificate, like “Versign Class 3…” If you have multiple certificates on the same data centre node (e.g. for successive wild card certs form the same provider) it is virtually impossible to identify the correct one…
Following this up further it turns out that:
– you actually can’t create two bindings for the same domain name, so you have to remove the first binding before you can assign a new cert
– despite what documentation and messages say the IP address is actually not created for the web site, but for the certificate.
If you use a wild card certificate on multiple websites, all these sites will get the same IP address. It also means that if you change the certificate the website gets a new IP address and you need to adjust the A record…
It looks like this has to be done for each certificate update.
Hi BGX,
Sorry for late response. Yes, you are correct that IP Address may change if you remove IP SSL binding and then assign it again. However, the IP address should not be lost when you just change the certificate for an existing IP SSL binding. If it does gets lost then it is a bug that we should fix.
Thanks for the great feedback! I will pass it to the team.
Thank you for this! I didn’t know the IP address would change and when I switched my site from TLS to IP I started receiving occasional certificate errors. I just updated my A record, so hopefully that will fix the problems. I works perfectly now after unchecking the TLS boxes in IE.
Thanks for the article Rus. Do you think moving from SNI to IP-based will resolve the issue report in this post: http://social.msdn.microsoft.com/Forums/windowsazure/en-US/58de9b0d-da5b-4bd6-8b75-8be10a3a3553/sporadic-wrong-certificate-being-served?forum=windowsazurewebsitespreview ? We are using SNI but some site users are reporting that they are getting delivered the *.azurewebsites.net SLL certificate.
The bit I’m still lost with is what the certificate should look like! It seems the certificate i created is not working, it matches the custom domain name, but much more seems to be needed. Nothing is documented in the azure website.